

Disney has shared so many great recipes this year that you can make yourself at home.
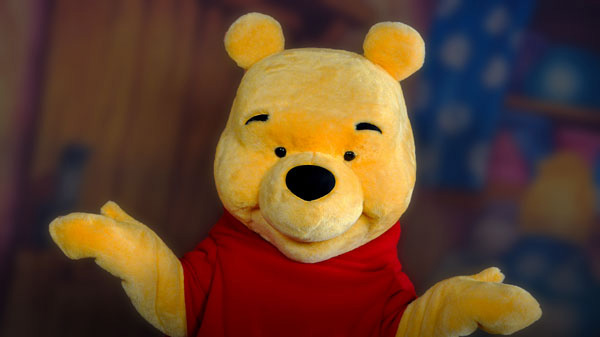
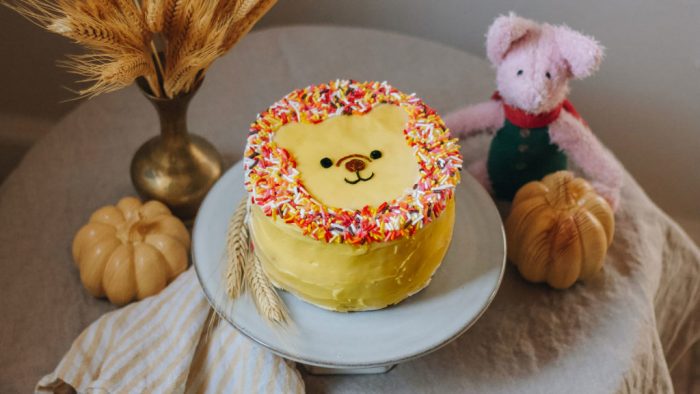
One of the latest is an adorable cake featuring none other than our favorite hunny-loving bear, Winnie the Pooh.
Disney Family recently shared the recipe for this Winnie the Pooh cake, inspired by the film Christopher Robin streaming on Disney+, and it’s almost too cute to eat!
Here’s how to make your very own!
Ingredients and Tools
- Your favorite cake recipe
- White frosting
- Multicolored sprinkles
- Wax paper
- Pencil
- Two small round cake pans
- Yellow food dye
- Black and brown decorative icing
- Scissors
- Tweezers
Instructions
- Preheat the oven and prepare batter per your favorite cake recipe’s instructions. Pour batter into two greased, round cake pans, and carefully place in the oven to bake.
- While the cakes are baking, sketch out a Winnie the Pooh face shape, about 2 inches smaller than your cake pans, on the wax paper. Use the scissors to cut it out, and set aside.
- Remove cakes from the oven and let them cool completely. After they’ve cooled, remove the cakes from the pans and place on a flat surface.
- Use a bread knife to cut off the rounded tops so the cakes are flat on top. Place the first cake layer on your cake stand and frost the top, then place the second layer on top and frost all over.
- Place the cakes in the refrigerator for a few minutes to help keep the crumb coat of frosting firm. This will help you get a nice, smooth finish and full coverage.
- Mix yellow food dye with the rest of your white frosting until you get the desired shade of yellow. Generously frost the entire cake.
- Place the wax paper Pooh Bear template on top of the cake and press lightly to make sure it’s smooth.
- Using a spoon, distribute the sprinkles all over the cake, concentrating especially around the edges. Dust off any extra sprinkles from the template, then use the tweezers to very carefully remove the template. Use a spoon or knife to smooth out any wonky frosting.
- Pipe Winnie the Pooh’s nose with brown icing, then use the black icing to pipe his mouth and eyes.
- Enjoy!
And that’s it! We’ll keep you updated with any more adorable recipes from Disney!
Will you be making your own version of this cute and easy Winnie the Pooh cake? Let us know in the comments!
Join the AllEars.net Newsletter to stay on top of ALL the breaking Disney News! You'll also get access to AllEars tips, reviews, trivia, and MORE! Click here to Subscribe!


Trending Now
Check out these new Stanley tumblers before they're GONE!
Cast Members can’t save you from dehydration, dead phones, or your own B.O. cloud. These...
Heads up! A new rule could be coming back to Disney Springs for Memorial Day...
These Disneyland rides will be closed at various points in May.
Whether you're dressing for a park day, prepping the kids for a trip, or just...
There are SO many secrets and hidden details all around Disney World, and there are...
Disney fans in their 30s, this Loungefly roundup is coming for your nostalgia, your wallet,...
Tons of new retro Disney shirts dropped online!
A fan-favorite Disney Cast Member is retiring!
These are the rain essentials we’ve actually tested in the parks and would pack again...
There's a NEW Disney 2026 merchandise collection online right now!
Come with us as we discuss everything you need to know about renting a wheelchair...
We've found the BEST hack to get you dining at California Grill WITHOUT the expensive...
It's full of major Disney World nostalgia!
Disney had announced a Passholder Preview for Rock 'n' Roller Coaster Starring The Muppets!
Which hotel at Universal Studios Orlando is the best or worst for your 2023 trip?...
There's a new Tinker Bell Loungefly online, and we LOVE it!
These Disney x Starbucks tumblers are FINALLY online!
A new Peter Pan Loungefly just dropped online!
Grab a new pair of shoes before your next Disney vacation!