


If you have a digital camera then chances are you have transferred your photos from your camera and/or memory card to your computer at least once. It’s possible you had little 9 year old Albie from down the street help you but don’t feel bad because you’re trying and that’s all that matters and you are not alone in this new digital world.
I’ll now show you that there are 3 different ways to transfer your images to your PC or Mac and explain which methods are better.
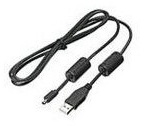
USB Cable – Every camera comes with this cable. You might also have a dock in which you place your camera before connecting the cable from your camera to your computer.
USB cables connect via a connection on the camera or dock to the USB port on your computer. Computers nowadays have multiple USB ports, most of which are on the front of the computer. Laptops also have them.
The upside is that the camera manufacturer supplied the cable. The downsides are that this is the worst way to transfer photos because it takes the longest amount of time and it uses up battery power from your camera. Wait, it gets worse. If while you are transfering images, your camera loses power, it can/will damage the memory card causing future failures and the possibility of losing precious memories.

Card Reader – These devices have gotten smaller and smaller over the past few years. You can choose from one that takes a specific type of card such as SD, XD, Compact Flash, and Memory Stick or a reader that accepts all types of cards.
Readers are a much faster solution than cables. Simply place your memory card into the reader and then plug the reader into the USB port. It’s just that easy. You may also use a software program to assist you and to place the images into a photo gallery on your computer.
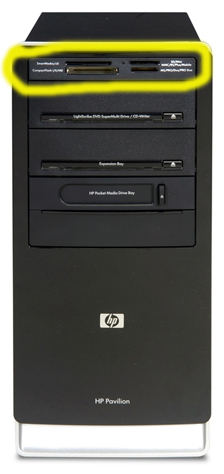
Built-in Computer Media Card Reader – If your computer accepts memory cards directly then you are golden! See the poorly drawn yellow circle on the image above? Inside the circle are the media card slots found on many computers.
No cables. Nothing additional to buy. You’ve got what you need already. Generally speaking once you place the card into the slot, your computer will offer you a variety of options on how to open the files and where to store them.
Be watchful for a message from your computer. It may ask if you’d like all of your images deleted after transferring. Click NO. When you’re ready to wipe out the card, do it in-camera using the Format process.
USB cable photo © Canon. Card reader photo © Lexar. Computer photo © Hewlett-Packard. Images used for educational purposes.


Hi – just curious why you recommend not deleting your pictures from the memory card while it is in your PC. I do this and then I format the card after putting it back in the camera. Am I possibly hurting something?
PS – thanks to all 3 of you for all the hints and tips!
Lisa responds: John sent this message before I posted the above comment from Liz.
No, you’re not really hurting anything, you’re just creating an extra step for yourself. You’re doing a great job by formatting your card every time you’re ready to start fresh. High-five!
Thanks — this is very helpful! I even got the hang of the card reader without little Albie’s help.
One question: You confirmed what I had heard before — you should delete images via the camera rather than card reader/computer. Why is that?
Lisa responds: When you format the memory card in your camera, you’re creating the ideal form of communication between the camera and the memory card. Deleting images via your computer is fine but you’ll still need to format the card in the camera.