


Lisa here, ready to bring you another installment of Light Meter! (echo, echo, echo) Today we are going to turn our attention to a little something that most moms and dads aren’t too familiar with, white balance. Rest assured, this has nothing to do with how many potatoes or how much cauliflower (Blech! TM Lisa) you eat. No, no, it is all about your digital camera, the heat it records, and the lighting in the image you’re framing.
My camera records heat? Yes, digital cameras differ from film cameras in that they are made up of computer parts, one of them being a sensor. Sensors capture the heat or “color temperature” (in Kelvin) where as film captured color.
Wait, wait, what IS white balance? The technical answer can be found on www.dpreview.com. The not-so-technical answer is that in order to record colors properly given the lighting conditions, the camera looks for white within the image to adjust off of. If there isn’t any white then the image can look dull and flat.
A large variety of point and shoot cameras allow you, the user, to adjust the white balance by selecting one of these options: Auto, Daylight, Cloudy, Tungsten, and Fluorescent.
Let’s look at some examples. First we begin with a colorfully painted building. If you’re unfamiliar with it, it can be found in Disney’s Hollywood Studios. Stand in front of the main entrance to Stage 1 Complany Store. On your left will be what looks like an alley. Head down the alley and look up on your left. Here you’ll find Miss Piggy holding Kermy ever so tenderly.
The day I shot this was overcast. I have not made any adjustments to these photos whatsoever.

Here the white balance was set to Auto.

White balance was set to Daylight here.

White balance was on Cloudy.

Tungsten

And finally, fluorescent.
The camera’s Auto White Balance did a terrific job of recording color, and not blowing out the white clouds. It’s remarkably similiar to what the Daylight mode captured. However, the Cloudy setting picked up bolder colors, adjusting for the lack of direct sunlight. Neither Tungsten or Fluorescent would be able to recreate natural light.
What most people have in their homes is tungsten lighting. These bulbs look yellow/orange in print and aren’t all that flattering to skin tones. To provide you with samples, I got some models who were just laying around underneath tungsten lights. Sure, they were in a smaller room than you or I would venture into but you get the idea.
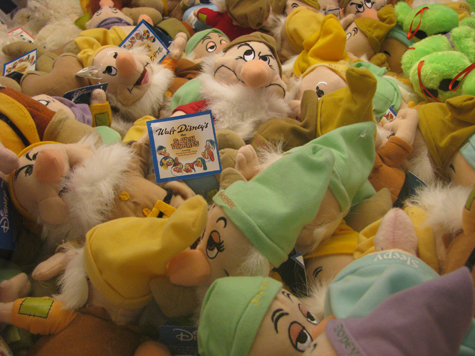
Auto Dwarf
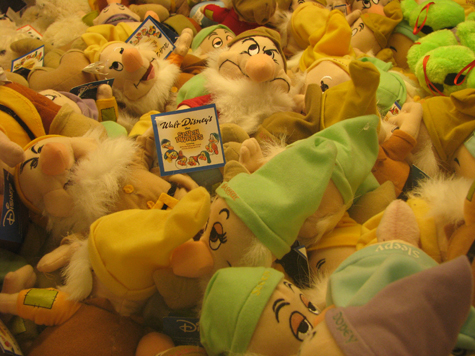
Daylight Dwarf
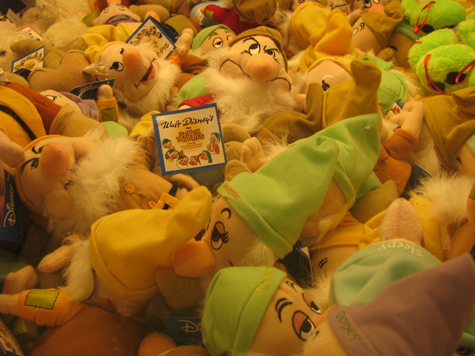
Cloudy Dwarf
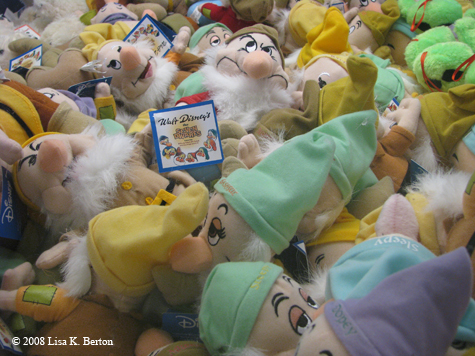
Tungsten Dwarf
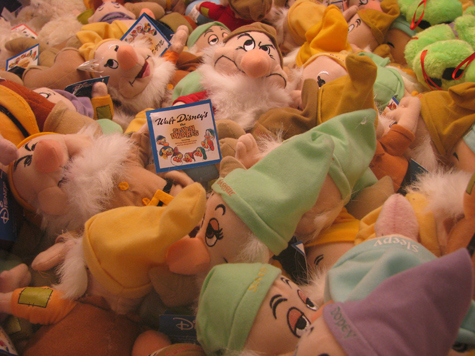
Fluorescent Dwarf
While Auto did a good job of eliminating most of the yellow/orange tint, some yellow still remains. Tungsten did the best job of color correcting.
Looking for a Dwarf? These guys are waiting for you to take them home from Toy Story Pizza Planet, first floor.
Want to get even more technical? Check out this webpage.
Scott’s previous piece about white balance can be found here.


Trending Now
This new rule can make Disney World Annual Passes harder to get!
Big things are happening at EPCOT this summer.
Orlando International Airport has new nonstop flights this month.
You can't miss this new HOKA drop!
Who knows Disney essentials better than the resort's most frequent guests?
If you're heading to Walt Disney World this summer, you need to know what's going...
Thinking of grabbing your mom a new Disney Loungefly bag for Mother's Day? Check out...
This restaurant is worth leaving the Disney World bubble for.
We REVIEWED a NEW Lion King Drink at Animal Kingdom! And We Have LOTS Of...
You'll want to go HERE in Disney World for Cinco de Mayo.
Some Disney World restaurants we once called iconic are in need of a change.
The internet had some comments for Disneyland's Han Solo!
Disney World ride closures just happen.
These two EPCOT shows are reopening in May.
These essentials will change how you travel forever!
Target just dropped a new Vera Bradley collection!
The popular store is one of several changes coming to CityWalk.
The popular perk needs to be booked by the end of April.
A new souvenir is available in Disney World but BEWARE.
Are the changes to the Disney Dining Plan still worth it?