


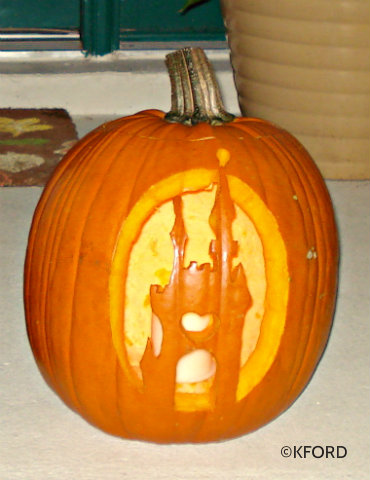
In Walt Disney’s classic film of 1950, the Fairy Godmother worked her magic on a pumpkin to transport Cinderella to the royal ball and, eventually, the fairy-tale ending of a wish come true.
This Halloween, you can show off your fandom of all things Disney by working your own magic on the pumpkin of your choosing. Luckily today, though, you won’t even need a magic wand. Rather an Internet connection and a little creativity will be all that is required for you to carve the perfect pumpkin with a Disney-inspired theme.
Like many families, mine enjoys designing, carving and decorating pumpkins each year for Halloween. Unlike in my native Indiana, though, here we wait until a few days before the holiday to prevent the jack-o’-lanterns from shriveling in the Florida heat. So, this past weekend, we visited a local pumpkin patch to let the kids choose just the right gourds for their designs.
When we returned home, my husband got out the knives and carving tools, prepared to make their visions come to life. (Tip for parents with young kids: Before you do the actual carving with sharp knives that you won’t let the kids handle, let the youngsters help you scoop out the seeds and insides of the pumpkin. This will give them a real sense of actually helping make your Halloween creation.) The requests from our kids ran the gamut of entertainment and life in Florida– a Creeper from the Minecraft video game, a dolphin and Jack Skellington from “The Nightmare Before Christmas.” Most years, our largest pumpkin is made to look like a Disney character, and this year was no exception.
Sometimes, my husband draws the design freehand and others he uses one of the many Disney templates available online. Both methods can be equally time-consuming but satisfying just the same. Of course, how you choose to create your pumpkin imagery will depend on your artistic talent and the complexity of the design.
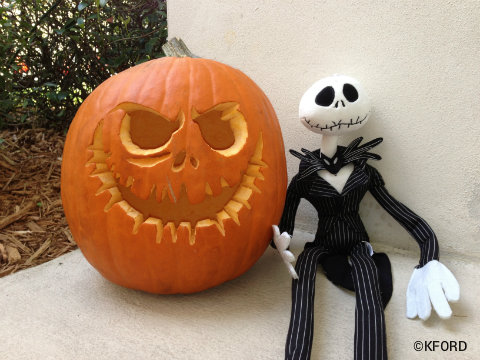
For this year’s Jack Skellington jack-o’-lantern, we used a printable template from Disney’s Spoonful.com. It can be transferred by scoring the design through the template or using the image as a guide for a line drawing on the surface of the pumpkin. The website offers tips for carving, including valuable advice for first-time carvers, such as that working from the center of the face outward avoids putting pressure on the areas already carved.
Spoonful has an extensive library of Disney pumpkin templates, from a clever design for the “Toy Story” Alien and a hair-raising image of Cruella De Vil to a pixilated Wreck-It Ralph, and beautiful Disney princesses. There are 31 templates in all, and they are free. Even if you want to create your own design, the site is a great place to start to get ideas for how to tackle your project.
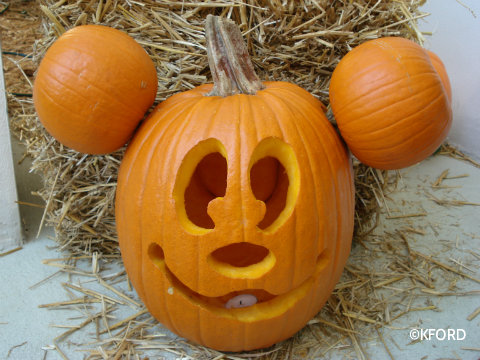
When my children were younger, we created a Mickey Mouse jack-o’-lantern by carving the face on one pumpkin and inverting two smaller pumpkins atop it for the ears. That style of pumpkin definitely has grown in popularity and even was seen in the decor on the Disney Dream this year.
Perhaps the most creative Disney pumpkins, though, can be found on Main Street, U.S.A., in the Magic Kingdom, where Imagineers have carved shapes that are related to the nearby shops and attractions where you see them displayed. You can see some of the 200 pumpkins in this photo gallery on the Disney Parks Blog.
And, if you are fortunate enough to attend one of the Mickey’s Not-So-Scary Halloween parties at the Magic Kingdom, be sure to be on the lookout for one distinctive jack-o’-lantern that you probably won’t see anywhere else. It will be coming down Main Street, held in the hand of a horseman who just happens to be “¦ headless.
Happy hauntings and good luck with your pumpkin carving.
![]()


Where in Indiana are you from?
KRISTIN: I grew up in Indianapolis and graduated from IU.
Love them! We did Cheshire Cat this year and got lots of compliments. We do a Disney one every year.. sad this year is over already!
Thanks, Kristin!
Great ideas! I’d love to know how you attached those two small pumpkins for ears to the large one to make the Mickey face! I was thinking of doing that but couldn’t figure out how to get them to stay on the large pumpkin.
KRISTIN: We carved a circle in the back of the pumpkin for access (instead of the top) and later replaced that section. The small pumpkins used for the ears were chosen for their long stems, which we connected inside with craft wire. Hope that helps!