


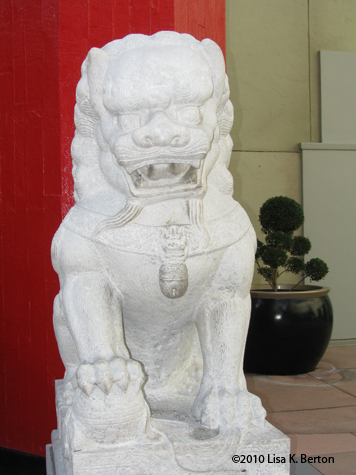
Dudes! Welcome to Disney’s Hollywood Studios in sunny Florida. Today, we are like totally going over to The Great Movie Ride but before you ride the ride, you dudes are going to meet a friend of mine. He’s totally strong and super quiet so don’t get like all upset if he doesn’t like talk. Here he is, a descendant of China, Heaven Dog. His brother is over on the other side of the attraction’s entrance cuz this building and it’s gnarly details are replicas of Grauman’s Chinese Theatre in Hollywood, California. Duuuuude.
My bud is gonna demonstrate how you can and why you should control how much light your flash fires. You will be most triumphant.
The camera is a Canon PowerShot SX100 IS and is set to P, as in Program. Why? Cuz Auto doesn’t let you make decisions and that is bogus, man. No settings were changed except for the flash and these pictures have not been altered in any way, dudes.
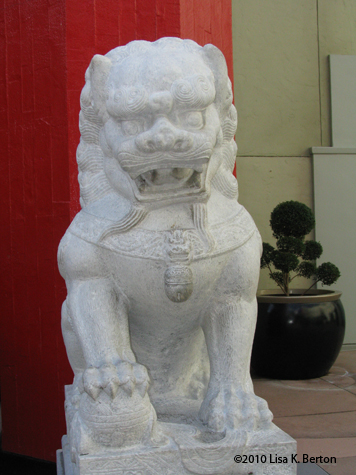
First, the flash was set to -2. This means the flash puts out 2 f-stops less than it normally would. While you can see all of the details in Heaven Dog, he’s kinda dark and the shadows are blue/cyan. If he were a dude, he’d look sick and that’s just heinous. Check out the dark background, too.
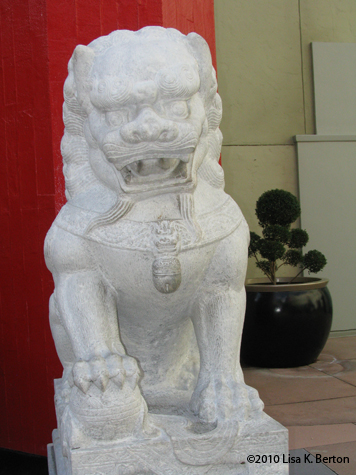
Next up, another picture but this time the flash is set to -1. Looking better but it’s still too dark and lacks life. Heaven Dog is still lookin’ blue.
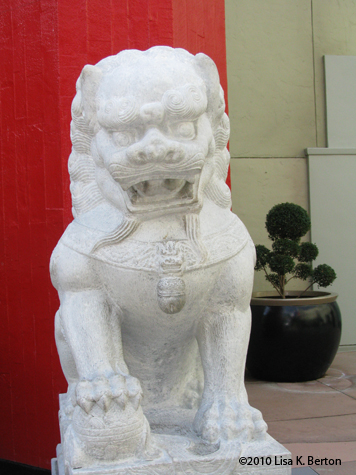
Now the flash is set to 0 meaning that the camera will send out the proper amount of light as it sees fit. In some cases, that’s too much which is why this setting exists. It’s way better than the other pictures and that red just pops. If I were to take this photo again, I’d lessen the strength by 1/3 which is possible cuz there are like fractions inbetween all of the whole numbers. Most excellent!
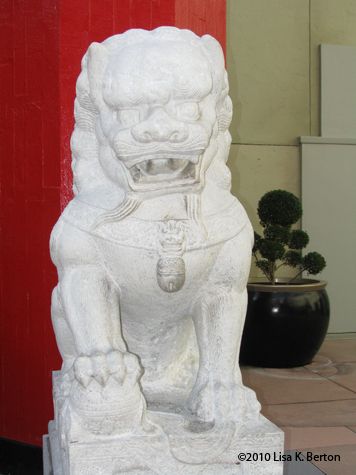
Here we have set the flash to +1. It fired more flash power causing some of the details to wash out, especially cuz Heaven Dog is off-white. In a dark room, that’d be radical but not right now. It’s good to know your stuff, dude.
Alright, here’s the last picture for you to study. What do you think the flash was set at? That’s right, +2. Excellent! You are a quick learner. I totally know you totally know too much flash means a loss of detail. It’s most overpowering.
Congratulations, dudes. You have just learned Flash Exposure Compensation. You’re going to need to check the manual for your camera for step-by-step instructions. In the meantime, turn to page 124 from Canon’s manual for the PowerShot SX100 IS. Note that in the Menu, Flash Adjust was set to Auto for these snapshots.
Good luck, dudes. Be most excellent to your cameras.


Like, thanks Lisa!
I’ve been sitting on the fence about going digital, just couldn’t give up my film, cuz it was, you know, comfortable. But when I saw your Wish List last week, it knocked me right off the boards and I went right out and got that G12 I’d been looking at. Now, I am way excited to practice Flash Exposure Compensation as my first project.
Thanks to all you photo bloggers for the inspiration you give us rank (does that mean smelly, or what?) amateurs.
Happy Hanukkah and Merry Christmas to all,
Collette
Lisa responds: Wow! That’s great, I’m glad to have inspired you to try digital photography. Did you buy a G12 for me too? 😉